How to install Portworx PX-Developer onto a DC/OS cluster running on vanilla AWS EC2 nodes.
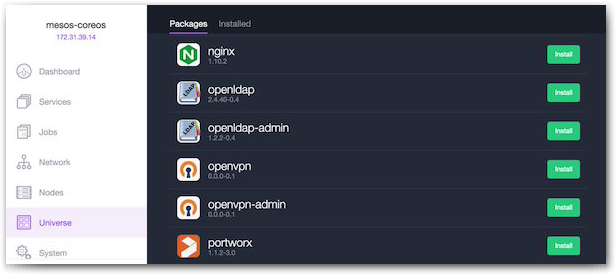
Recently Portworx became part of Mesosphere Universe, the DC/OS app-store of container images that allow you to scale, update, and upgrade complex services like Cassandra, Kafka, ElasticSearch, Hadoop and other stateful services. Using the Mesosphere Universe, you can install Portworx in your DC/OS cluster using a single command and use Portworx as persistent storage for DC/OS and Marathon:
$ dcos package install --yes --options ./px-options.json portworx
This post is about why you would want to do that and how Portworx can help you run your mission-critical stateful services on Mesosphere DC/OS. We’ll start with some background on Mesos, Marathon and DC/OS. Feel free to skip that if you are already familiar.
Background on Mesos, Marathon and DC/OS
Consumer-facing services like Siri and Twitter run at unimaginable scale, and deployments often involve thousands of compute nodes.
A battle-proven, enterprise-grade solution to orchestration at this scale is Apache Mesos. It pools compute nodes and makes them available to pluggable frameworks to use when deploying workloads.
Marathon is a Mesos framework that will schedule Docker containers onto your cluster of compute nodes. This frees up developers to concentrate on their Dockerfile and Marathon will think about what compute node to run the container(s).
DC/OS is a packaged version of Mesos and Marathon (along with other tools) developed by a company called Mesosphere. It has a GUI and CLI to make the operation of a Mesos cluster running Marathon easier. DC/OS includes an app-store of services that you can install with a single command called Universe. Portworx is available in the Mesosphere Universe. We’ll see how to install it below.
State{ less, full }
The Mesos/Marathon stack will work great if your entire workload is stateless (perhaps a Twitter bot or a Google Maps api client). Quite often though, there is a process or two that will require persistent storage (perhaps a Postgres or Redis server).
Following the 12-factor manifesto we could run our stateful services as pet’s not cattle and install them on single-purpose static servers.
This seems like a shame, we have the full power of an industrial grade container scheduler but still have to manually operate some of our stack.
What if we had a tool that treated our heterogeneous compute cluster as a heterogeneous storage cluster too?
Portworx
Portworx storage offers a container aware storage fabric that will run on a commodity cluster of compute nodes.
This lets us schedule a stateful workload using Marathon and not worry if it ends up on node A, B or C – Portworx storage will provision a volume before the container starts (because of the low-level Docker volume plugin)
Because Portworx storage offers replication – we automatically have high-availability for our Postgres, Redis, MySQL or otherwise stateful container (if the container lands on another node – Portworx storage will ensure the data is there).
We can also take snapshots of existing volumes and then run other workloads against the snapshot volume. For example, we could easily run a test-suite against a snapshot of production data only a few seconds old.
Compute AND storage
Mesos plays the role of the kernel in our cluster and Marathon that of the init system. This allows us to treat a cluster of many nodes as one large computer.
Adding Portworx storage to this cluster means we now have a unified storage layer. It knows where containers are and what volumes they need. It will get the data volume in place before the container starts and constantly replicate data to other nodes without the container needing to know.
Unify your entire stack and deploy stateful containers alongside stateless processes to the same cluster using the same orchestration framework.
Let’s get to it!
In this walkthrough of deploying and running Portworx on DC/OS, we will:
- configure the aws cli
- create a DC/OS cluster using AWS CloudFormation
- setup nodes and attach block devices
- deploy etcd and marathon-lb using dcos
- deploy px-dev using DC/OS
- explore our Portworx cluster using pxctl
- deploy a stateful app
- demonstrate HA by doing failover on the app
- snapshot a volume
- run a staging app against our snapshotted volume
Create a dcos cluster
Following these steps assume you have have an OSX or Linux CLI and an AWS account
Install AWS cli
NOTE: you can skip this step if you already have a working aws command with configured access credentials.
First download and install the aws cli
Then we configure the aws command with our access keys:
$ aws configure
Make note of the region you choose – for example this demo will be run inside eu-west-1.
You can get your AWS Access Key ID and AWS Secret Acess Key from the Security Credentials page of the AWS console.
Also – you will need to create a key pair in the region you will run your stack.
NOTE: once you have downloaded a key-pair – change permissions and add it to your key-chain:
in this example the key-pair I downloaded was called kai-demos.pem
$ cd ~/.ssh
$ chmod 600 kai-demos.pem
$ ssh-add kai-demos.pem
Launch cloudformation stack
Now we will use cloud formation to launch a DC/OS cluster with 1 public and 3 private slaves.
Use the cloud formation template – and pick the single master configuration and the region you created/have a key pair for.
Click Next and configure the details for our stack:
- call the stack
pxdemo - choose the key pair you have for the region
- change
OAuthEnabledto false - change
SlaveInstanceCount3
Click Next and Next again.
Review the details and make sure you click the AWS::IAM::Role box at the bottom before you click Create.
The stack will start spinning up – it may take up to 10 minutes, you can keep an eye on the progress using the CloudFormation screen.
Install DC/OS CLI
Grab the URL of the Mesos master from the Options tab and copy it to your clipboard:
open this URL in a browser and you’ll see the dcos dashboard
On the bottom left you will see the installation button for the DC/OS CLI – install this onto your laptop.
Now we can use the dcos cli to explore our cluster:
$ dcos node
setup nodes
Clone repo
First we clone this repo so we can use admin.sh and the Marathon manifests.
$ git clone https://github.com/binocarlos/portworx-dcos.git
$ cd portworx-dcos
Check our instances
First – if the stack you created was not called pxdemo – export the STACKNAME variable:
$ export STACKNAME=my-custom-stackname
Now we can list the status of our nodes:
$ bash ./admin.sh describe-nodes
Setup nodes
Portworx requires a shared mount namespace setting for versions of Docker before 1.12 – this is so it can mount block devices from inside a container.
Also, we need a block device on each node dedicated to container storage.
$ bash ./admin.sh setup-docker
$ bash ./admin.sh create-volumes
Let’s check that the block devices were attached.
$ bash ./admin.sh run-command lsblk
Install DC/OS services
Portworx requires a key value store like etcd or consul so it can co-ordinate cluster state.
Also – so we can see our application from the outside world – we need to install marathon-lb – a layer 7 load-balancer.
We will use the dcos cli to install both services onto our cluster.
$ dcos package install --yes etcd
$ dcos package install --yes marathon-lb
We can see the status of these services:
$ dcos service
$ dcos marathon app list
Wait for the etcd-server tasks and marathon-lb tasks to be running.
NOTE: in future, etcd will be installed automatically alongside portworx.
Setup portworx
Create config
So the Portworx storage agents know where the etcd server lives – we need to pass a configuration file that includes the endpoint of the etcd server we just installed.
To generate this config:
$ bash admin.sh px-config
To write it to the correct file:
$ bash admin.sh px-config > px-options.json
Deploy portworx
Now we deploy portworx using DC/OS:
$ dcos package install --yes --options ./px-options.json portworx
Check the status of the portworx deployment:
$ dcos marathon app list
Wait for all 3 portworx tasks to be healthy.
pxctl
Now we can explore our storage cluster – first let’s login to one of the slaves:
$ bash admin.sh ssh-px-node
pxctl is installed onto the host as /opt/pwx/bin/pxctl – we can use it to operate our storage cluster:
core$ sudo /opt/pwx/bin/pxctl status
Create shared volume
Now let’s create a shared volume that we will use for our demo application:
$ sudo /opt/pwx/bin/pxctl volume create app-prod --shared --size 5 --repl 3
$ sudo /opt/pwx/bin/pxctl volume list
$ sudo /opt/pwx/bin/pxctl volume inspect app-prod
$ exit
Deploy stateful application
We deploy the app manifest using marathon and wait for it to be ready:
$ dcos marathon app add app.json
$ dcos task
Now load the application in a browser and create some state.
$ open `bash admin.sh app-endpoint`
HA failover
To simulate HA failover of our application container AND it’s data – let’s do a sneaky docker rm -f for the container.
$ bash admin.sh kill-app-container
Notice the DC/OS dashboard notice and re-schedule the container.
Let’s check the node the px-counter app is running on.
$ dcos task
Repeat the kill-app-container until you can see the container has landed on a differnt node.
Now reload the URL in the browser and magic – our data is still there!
Snapshots
Now we create a snapshot of the volume so we can run a CI test against it.
$ bash admin.sh ssh-px-node
core$ sudo /opt/pwx/bin/pxctl snap create --name app-ci-test app-prod
core$ sudo /opt/pwx/bin/pxctl snap list
Now create some more state in the production application in your browser so our production data and app-ci-test snapshot have diverged.
Deploy a test version of the app against the snapshot
Copy the following config file and save it in the same folder as admin.sh as a file called app.test.json:
{
  "id": "px-counter-test",
  "container": {
    "type": "DOCKER",
    "docker": {
      "image": "binocarlos/px-counter:latest",
      "parameters": [{
         "key": "volume-driver",
         "value": "pxd"
      },
      {
         "key": "volume",
         "value": "app-ci-test:/data"
      }],
      "network": "BRIDGE",
      "portMappings": [
        { "hostPort": 0, "containerPort": 8080, "servicePort": 10001 }
      ],
      "forcePullImage": true
    }
  },
  "env": {
    "FILEPATH": "/data/items.json",
    "NODE_ENV": "test"
  },
  "instances": 1,
  "cpus": 0.1,
  "mem": 256,
  "healthChecks": [{
      "protocol": "HTTP",
      "path": "/",
      "portIndex": 0,
      "timeoutSeconds": 10,
      "gracePeriodSeconds": 10,
      "intervalSeconds": 2,
      "maxConsecutiveFailures": 10
  }],
  "labels":{
    "HAPROXY_GROUP":"external"
  }
}
We deploy this manifest using marathon and wait for it to be ready:
$ dcos marathon app add app.test.json
$ dcos task
Now open the test website in another browser tab. To get the url use this command:
$ bash admnin.sh app-endpoint test
The test we ran should have added one more logo to the top-left of the screen. This is an example of running a test-suite safely against production data!
We can see the logs of the test suite by running the following command:
$ dcos task log --lines 100 px-counter-test
Conclusion
In this blog, we saw how to deploy and run Portworx via DC/OS Universe. In the next blog post, we’ll look at a real world scenario for running Cassandra in production using Mesos, Marathon and Portworx.
Did you enjoy what you just read? Learn more about Docker, Kubernetes or DC/OS storage.
Share
Subscribe for Updates
About Us
Portworx is the leader in cloud native storage for containers.
Thanks for subscribing!

Kai Davenport
Kai has worked on internet-based systems since 1998 and currently spends his time using Kubernetes, Docker and other container tools and programming in Node.js and Go.
Explore Related Content:
- dc/os
- mesosphere
Accelerating Production Deployments of Data-Rich Applications on Mesosphere DC/OS with Portworx